Thursday, November 8, 2012

Fermentation Temperature Control

All the brewing resources out there put heavy emphasis on fermentation temperature, and for good reason.  Yeast are actually making your beer, after all, so it's important that the conditions of fermentation are optimal for the yeast to perform as we want them to: adequate attenuation without off flavors or aromas.  Many factors contribute to this, including pitching rate, oxygenation, wort composition, and water characteristics.  But by far the most important factor, and the one homebrewers should get control over first, is temperature.

There are a lot of products out there that are designed to help homebrewers maintain proper temperature.  The products range from heating pads to carboy parkas to full-blown glycol jacketed conical fermentors.  All of these are probably effective, but it's also possible to get a handle of fermentation temperature with just a few inexpensive items from your local hardware store:

A plastic tub:  $5-10.  Fill this about 1/3 full of water (I use leftover sanitizer from the end of brew day), and set the carboy inside.  Surrounding the carboy with water increases the thermal mass which has the effect of slowing temperature changes.  The water also serves as the medium for temperature variation by adding cold or hot objects.


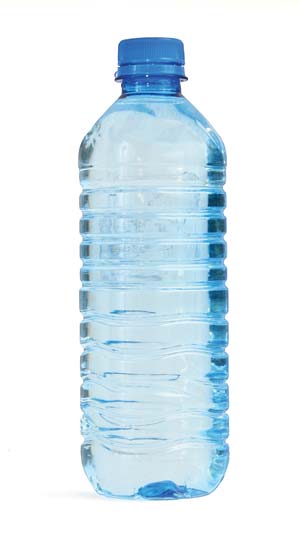
A dozen water bottles: $5ish.  Store these in the freezer.  To cool the fermentor, add 4-6 frozen bottles and cycle them between the tub and freezer every 12 hours.  Even in the hottest summer months, you can keep your fermentation temps in the mid to low 60s using this method.

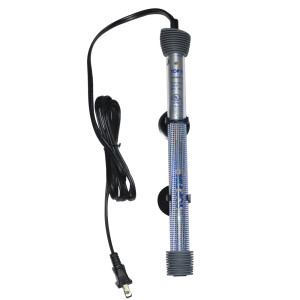
Submersible aquarium heater: $20.  Use this to warm up the fermentor if your ambient temps are cool or towards the end of fermentation if you want to ramp up the temperature to maximize attenuation.  These things aren't exactly accurate, but I can't think of an easier way to heat of a tub full of water (up to 80ºF).  


Infrared thermometer: $20.  Of course, you'll need a way to read the fermentation temperture.  This is a cheap and fairly accurate tool.  Use it to check the temperature of the tub water, adding a few degrees when fermentation is active.

Thursday, September 13, 2012

Hoppily Ever After / Entombed

My dear friend and step-grandfather Mike Bosak passed away a few weeks ago at the age of 91 in Carlsbad, CA.  While living in Temecula he founded All About Beer magazine and was a beer enthusiast since craft got started down in Northern San Diego.  Story goes he gave his entire brewing book collection to Vinny C before Blind Pig was formed.  At least I think that's the story, can't ask him anymore... such is life.  He fostered my early interest in homebrewing, gave me a stack of old All About Beer mags and accompanied me on my first visits to Stone.  I just got married and he helped me nail down the recipe for my wedding brew that we served on tap and gave away in bottles.  Sadly he left just days before the wedding, and never got to taste the final version.  His children and grandchildren decided to bury him with a bottle of the brew so he might enjoy it in the hereafter.  This is a huge honor.

Hoppily Ever After / Entombed Rye IPA

7.7 gal pre-boil, 6 gallon post, 60 min
Mash: Single infusion @ 149, batch sparge
O.G. 1.065. Pre-boil gravity: 1.055. F.G. 1.012
Fermentation Temp: 62-72

Grain Bill
11 lb 2row
2.2 lb Flaked Rye
1 lb C20
.4 lb carapils
.4 lb wheat

Yeast
WLP001
Hops
1.5 oz Centennial @ 60
0.5 oz each of Simcoe & Citra @ 10 & 5
1.5 oz each of Simcoe & Citra @ 1
1 oz Centennial Dry Hop
2 oz Citra Dry Hop

Others
1 Whrifloc tablet

Water Treatment:
Base: Arrowhead Spring Water
Mash: 2g Gypsum, Calc. Chloride, & Baking Soda. 3g Epsom
Boil: 1.8g Gypsum, Calc. Chloride, & Baking Soda. 2.7g Epsom

Note: I brewed this five times with different combinations of Simcoe, Citra, Amarillo, and Centennial. All tasty but some Centennial is required in the dry hops to balance the fruity.

Friday, February 17, 2012

Compact Kegging

Almost every homebrewer I've met became fed up with bottling their beer at some point and made the jump to kegging.  Generally this involves dedicating an old fridge or chest freezer to serve as a cold box for the kegs.  As a small apartment brewer, this is a huge challenge.  What can you do without adequate space for a kegerator?

My solution was to get some 3-gallon corny kegs and pray that they would fit in my kitchen refridgerator.  As it turned out, I could fit two of them in there after removing one half-width shelf.  To get acquainted with the process of kegging, I decided to start by naturally carbonating the beer in the keg by priming it with corn sugar (as one would for bottling).  Then I hooked up a keg charger to push the beer out.

That turned out to be a pretty bad solution.  I kegged two batches in this manner and both of them came out improperly carbonated and having a little gassy taste (perhaps from excessive CO2 squirting from my chargers).  I decided I had to take the plunge and get a proper 5lb CO2 thank and regulator, and again pray that it would fit in the fridge.  If that didn't work, then I would have picked up a mini-fridge somewhere and tried to hide from my fianceé.  But to my delight, the tank, regulator, and both 3-gallon kegs do indeed fit in the fridge, taking up about 1/3 of the space.  This is fine, as we don't keep a lot of items in our fridge (we eat fresh and shop often).

So there you have it.  It is possible to keg in your apartment if you get some small kegs.  Unfortunately they are extremely expensive these days and very hard to come by on the used market.  I was lucky enough to spot a few at my local homebrew shop for a good price.

Tuesday, January 17, 2012

Rye Pale Ale Update

In the previous post, I complained about my Rye Pale Ale, which was rushed through primary, dry hopping, and then bottled with too much dextrose.  At the time of that writing, it had what I think was diacetyl--a butterscotch flavor, fruity aroma, and slick mouthfeel.  Well, about a month later the beer has totally transformed in the bottle.  Behold:


These were the last two pints of the stuff, which I saved for re-brew day.  It was sparkling clear, effervescent, and damn refreshing.  The veil of diacetyl was lifted revealing the citrusy hop aromas and clean crisp flavor.

Moral of the story: give your homebrew plenty of time to mature, and then some!

Here's the recipe:

Brew #13: Ryeball (Rye Pale Ale)
Brewed 11/7/11
7 gal pre-boil, 5.25 gallon post, 60 min
Mash: Single infusion @ 150, batch sparge
O.G. 1.053.  Pre-boil gravity: 1.043. F.G. 1.014 ( AA)
45 IBU
Fermentation Temp: Pitched at 70, chilled to 60 over night. Held for 36 hours, let ride to ambient (67º)

Grain Bill
7.5 lb 2-row
2 lb Rye malt
0.85 lb Caramel 20L
0.35 lb Carapils
0.35 lb White wheat Malt

Yeast
WLP 001 California Ale
Hops
.5 oz Columbus @ 45
.5 oz Casacde @ 25
1 oz Cascade @ 10
1 oz Columbus @ 1
.5 oz Cascade (dry hop)
1.5 oz Columbus (dry hop)

Others
1 Tsp. Gypsum
1 Whrifloc tablet

Wednesday, December 21, 2011

Patience is everything

Rushed Rye Pale Ale...
The most important step in homebrewing is being patient and not rushing things.  Beer-making is a process of harnessing mother nature in a very controlled and mechanical way.  As homebrewers we come to understand how to clean things, mix things, heat things up, make sanitary transfers, and foster an ideal environment for fermentation.  Eventually we develop an intuition about these things and have a great deal of control over each step of the process.  For me, fermentation is one area in which I have to give up control and give mother nature the time she needs to get the job done.

Sparkling IPA (un-carbonated sample)
I brewed a batch of Pale Ale a few weeks ago and, due to time constraints, had just 10 days to get the beer fermented, dry-hopped, and bottled.  The result was 'just ok'.  It was pretty yeasty, a bit over-carbed, and had a tinge of diacetyl.  As hard as I tried to set up a recipe, yeast pitching rate, and fermentation temperature profile that would work within the ten-day window, it just wasn't enough time to get below 1.014.

My next batch, a Maris Otter IPA, had no such time constraint.  I let it sit at 65ºF for 4 weeks before racking to secondary and dry-hopping.  The sample was sparkling clear and had a perfectly clean and refined flavor, on par with some of my favorite commercial beers.  Its now sitting in secondary on some amarillo hops.

Monday, November 21, 2011

Double Brew Day

To celebrate the arrival of four pounds of American hops (Centennial, Chinook, Citra, Amarillo), I wanted to brew a West-Coast IPA.  My buddy Charles had the same idea to showcase his home-grown Columbus hops.  So I tossed all my brewing gear in the car and headed up to his place for a little dueling brews.  The thought of packing, loading & unloading everything twice in a day was a bit intimidating, but it turned out to be pretty easy and the benefit of brewing with a (much more experienced) buddy far outweighs the inconvenience.  A checklist is mandatory if you ever want to take your brewery on the road.  It turned out that all the small items I needed fit into a single bucket and the big stuff was all in one spot anyway.  Chalk up another benefit of being a 'compact' brewer.

As for the recipe, Charles came up with the base recipe, and my version used a different base malt & hop bill:


Brew #14: CentenniAmarilloBomb
Brewed 11/19/11
7 gal pre-boil, 5.5 gallon post, 60 min
Mash: Single infusion @ 149, batch sparge
O.G. 1.065.  Pre-boil gravity: 1.054. F.G. 1.0??
77 IBU
Fermentation Temp: ~64ºF
Grain Bill
10 lb Maris Otter
1.75 2-Row
0.5 lb Carapils
0.5 lb C20
0.1 lb Honey Malt

Yeast
WLP 001 California Ale

Others
1 Tsp. Gypsum
1 Whrifloc tablet
Hops
.75 oz Columbus @ 60
.5 oz Centennial @ 10
.5 oz Amarillo @ 10
.75 oz Centennial @ 5
.75 oz Amarillo @ 5
.75 oz Centennial @ 1
.75 oz Amarillo @ 1
1 oz Centennial (dry hop)
1 oz Amarillo (dry hop)
His version used all 2-row malt and Columbus hops.  When the two beers are ready we'll do a side-by-side tasting.

Monday, October 3, 2011

Craft Beer in the South Bay

I live in Los Gatos now, and when I moved here the question presented itself: where's my local pub?  It didn't take long to find Los Gatos Brewing Company.  It's a good restaurant with some great fresh beers, but I was still left searching for a bar with a constantly rotating selection of craft brews from around the world.  This was so easy to find in the other places I've spent time:  L.A., South New Jersey, Philadelphia, New York, Ann Arbor MI, and even Palo Alto has a decent spot.  So what gives?  Where are the good bars and brewpubs in the south bay?

Harry's Hofbrau

I'd been hearing a bit of buzz about Harry's Hofbrau San Jose location, which is about 10 minutes from my house, so I gave it a try.  I was totally impressed, but in a way I wasn't expecting at all.  The place is a huge dining hall with a cafeteria-style counter off to one side.  You pick up a tray and tell the carvers behind the counter what you want.  The food selection is awesome, actually, featuring all kinds of hand-carved roasted meats, sausages, cabbage, and of course gravy.  What the place lacks in fine dining it makes up for in huge portions and cheap prices.  Across the gigantic dining room is an enormous bar area, where a dozen or so tap handles are a most welcome sight.  According to Peter at betterbeerblog.com, Harry's just recently transitioned into being a craft beer haven.  Apparently, they have been running a series of "pint nights" featuring selected breweries and awesome deals.  Here's the full report of the series.  I hope they continue to do this!

What else is out there?

My list of beer-centric establishments in the South Bay is as follows:

  • Firehouse Brewpub in Sunnyvale
  • Campbell Brewing Co. / Sonoma Chicken Coop in Campbell
  • Harry's Hofbrau in San Jose
  • Los Gatos Brewing Co. in Los Gatos and San Jose
  • Faultline Brewpub in Sunnyvale
  • Yard House in San Jose (Santana Row, ack!)
Surely, there has got to be more out there...